Subscribe News Feed Subscribe Comments

Welcome To My Joint!

Hello, thank you for visiting my blog. Click on any picture to enlarge and view the Disclaimer at the very bottom.
Showing posts with label ideas. Show all posts

Dust-Free Brushes


I had to make another brush holder and decided to reserve my old one for eye brushes and my new one for face and lip brushes. Yes, I'm a germ freak and a neat freak. And I don't use every single brush everyday so some of them will get dusty. After spending so much time washing and drying them, plus the money spent, I might as well take care of my brushes and give them their own dust-free home to rest in. They are also protected from any aerosol can spray like air freshener or Lysol...Oh, and spiders too. LoL. Spiders seem to pop up in my room.

I get asked all the time where I got the clear plastic box from. Well, I got it from a little craft store called Beverly's and have not seen these at my local Michael's or Joann (why are all craft stores named after somebody? LoL) It's just called "Craft Box" and the brand name is Darice. This was only $2.99 and the dimensions are about 7" tall by 4"wide. A lot of them in the store were scratched up or cracked so I had to spend some time looking for a nice one.

The clear little cylindrical-shaped beads that appear white are called Colorfill and a bag of it is around $5. It's used in floral arrangements and I give all the credit to YouTube's EnkoreMakeup.
I added some black ribbons with white polka dots to hide the top line of the Colorfill because it's a little uneven at times. I also keep the clear plastic brush sleeves on most of my face brushes. Since I didn't have enough Colorfill (I used leftovers from last time) I have to reach down into the box to get my flat top buffer brushes and I don't want to touch the bristles and add germs. So the sleeves protect them.
Have you made a brush holder yet? What does yours look like? =)

*UPDATE*
Here's a current picture of my brush holders. (June 10, 2009)


Ulta Eyeshadow Love


I love Ulta eyeshadows! I already owned 4 of them and bought 8 more and I really wished I had ordered more since they were only $1.25 each but that special is no longer going on.
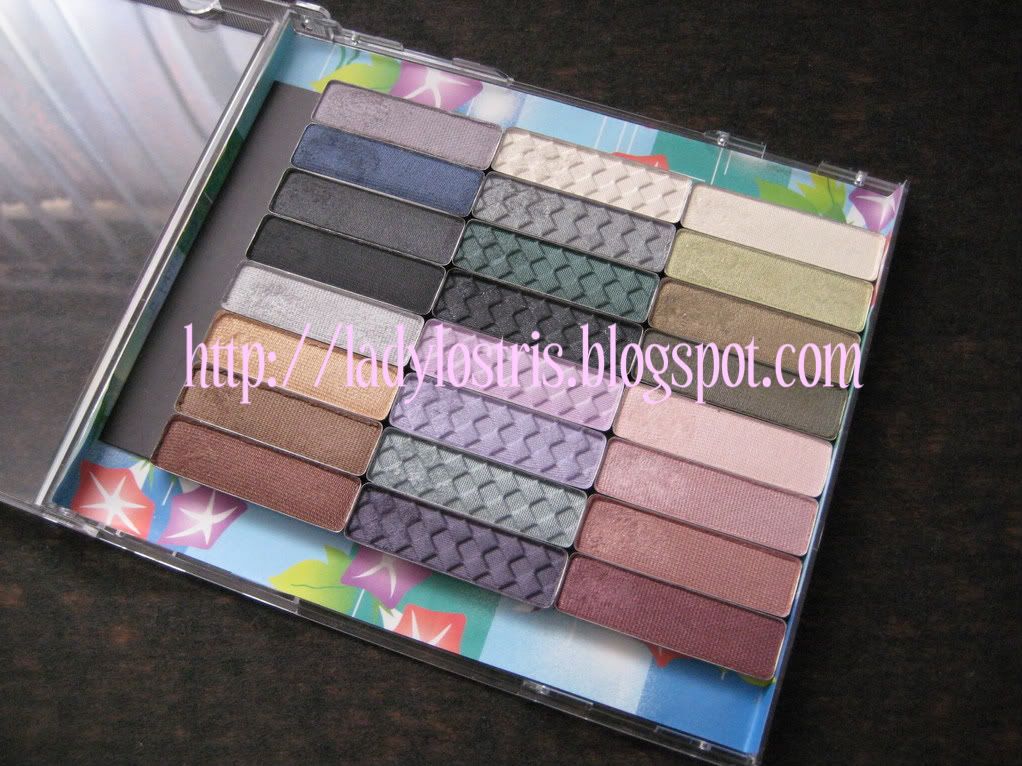
I had planned on putting them into magnetic CD palettes but decided to skip on that idea. I removed various eyeshadows (e.l.f. Milani, NYX, pressed Everyday Minerals, MAC Starflash) that were in my second MAC palette and put them into my homemade magnetic palette that I got from Coastal Scents as you see below.


Then I removed the insert from the MAC palette that covers up the metal sheet on the bottom that's been spray painted gray. The sheet seems to be glued down to the plastic so I didn't need to worry about adhering that down.


Next I depotted the eyeshadows, which are about the second easiest thing I've ever depotted. Revlon Colorstay being the first and Milani singles being the third easiest. All you do is get a nail file and push down and away on the top edge of each pan. This pushes up the other end of the pan and while pushing down on one end, you grab the popped-up end with your other hand/finger. The little dot of sticky glue you see below is all that holds the pan in place.


After removing the excess glue with rubbing alcohol and paper towels, I peeled and stuck on adhesive magnets. I like cutting squares and I just simply labled each shadow by writing on the bottom of the pans with a Sharpie.


Ten Ulta eyeshadows will fit into a MAC palette with the insert taken out of it. I could also squeeze in only two regular sized eyeshadows at the bottom. They could not fit near the latch part at the bottom center.


Two stragglers had to be put into a CD palette. On the left is Dusk and on the right is Chestnut. These pans do not have magnets stuck behind them because the metal of the pan will stick better to the magnetic sheets.

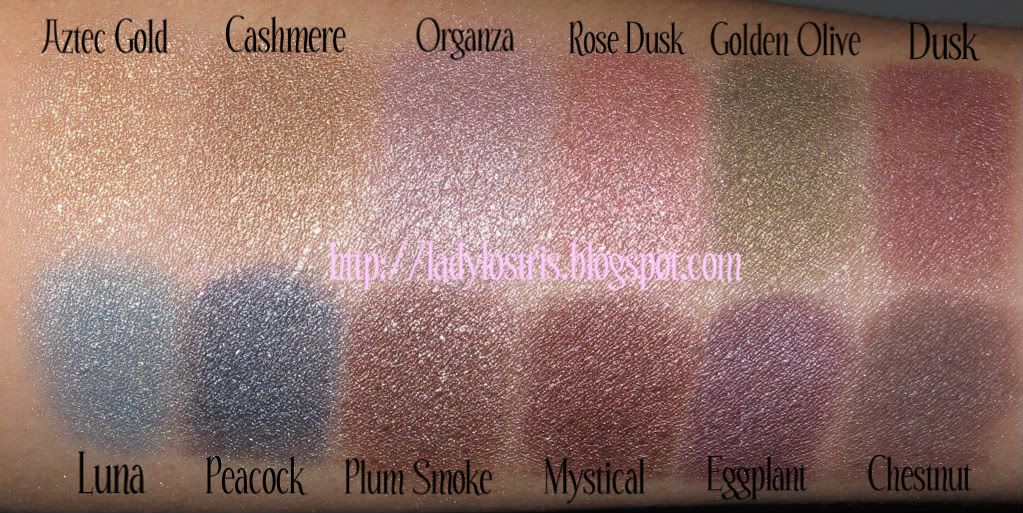
Swatches in Natural Light (click image to enlarge)


Swatches with Flash (click image to enlarge)


Just a different angle. I used a Physician's Formula Color Eyes Cream Shadow Stick in Champagne as a base for the swatches.


COLOR DESCRIPTIONS

  • Aztec Gold - high pearl gold color; the texture of this is different than all the others; this one has bigger pieces of shimmer in it
  • Cashmere - shimmery camel color
  • Organza - light lilac shimmer, slightly taupe
  • Rose Dusk - light/medium pink shimmer
  • Golden Olive - shimmery olive green with a gold sheen
  • Dusk - darker version of Rose Dusk but more of a semi-matte finish
  • Luna - shimmery turquoise with a golden sheen
  • Peacock - shimmery medium blue; a true blue
  • Plum Smoke - shimmery bronzey color with a very slight and subtle plum tone
  • Mystical - shimmery darker version of Plum Smoke but has more red/burgundy tones
  • Eggplant - satin purple with cool tones rather than warm tones
  • Chestnut - semi-matte taupish-brown
I hope this helped in anyway! These eyeshadows are the same size but some of them say 3.0g on the label while others are 3.8g. I don't know why. It's not due to the different finishes neither. They are currently on sale online for $2.50 each which is a great deal because they are normally $7.00. Even with a BOGO, $2.50 is still cheaper than $3.50 so get them while the special lasts. I don't know if this special is going on in the stores also.
I have no idea why I didn't get more greens because that's my favorite color.

I also picked up the 65 piece Blockbuster Set only for the eyeshadow and the case. That post will be coming soon... =)

UPDATE! I got more...
This is my "jewel-tone" palette

COLOR DESCRIPTIONS

  • Lustre- shimmery, very light silvery taupe
  • Gold Leaf- shimmery light gold
  • Terracotta- shimmery orangey-peach
  • Radiant- shimmery light celery green
  • Verdigris- shimmery medium green with gold
  • Envy- shimmery green with blue tones, more bluish green than Verdigris
  • Brass- shimmery mid-toned bronze
  • Sapphire- shimmery royal blue
  • Night Sky- shimmery deep cool purple with multicolored glitters
(A NYX Jumbo Eyeshadow Stick in Cottage Cheese was used as a base in these swatches)

Need More Space?: Tabletop Storage

I've had this setup for a while now. These were both from Walmart and the white unit was under $7 while the black unit was under $4 or $5 if I remember correctly. I needed these for extra storage since my train cases weren't sufficient anymore. I recently reorganized these items and there's more stuff underneath this table on shelves. But that's another story. =) I lined the bottom of the drawers with non-slip padding and also the bottom of each unit to prevent slippage.

I love the back compartment on the top of this. It's the perfect place to put my most often used lippies. Under the flip-top lid is where I put my MAC Colorforms brushes, my concealer palette, EDM Baby Kabuki, custom foundation mixes & my Clinique compacts that have the powder washed out of the pans. I use these to tap in my mineral powders from sample jars and then I can dip my brushes in them. (Oh and those are not passwords on the yellow Post-It note. LoL. They're just shortened book titles)

Two layers of lippies and lip pencils. I have Jordana & NYX lipliners, an NYC lipstick, Revlon Colorstay lipglosses, e.l.f. lipglosses and candy shop tins, Wet & Wild pot glosses, Clinique & Rimmel lipsticks, one Laura Mercier gloss, Victoria's Secret Beauty Rush lipglosses underneath and a MAC clear lipglass (which is sticky but the stickier it is, the longer it lasts. It's my fave gloss to put over anything to help make any color last longer. I used to eat Subway sandwiches with this over a lipstick and my lips would still look good after lunch!)

Wet n Wild & NYC eyeliners, some crappy e.l.f. eyeliners, L.A. Colors 6-color palettes, Jane eyeshadow and Be Pure Mineral Gel liner, NYX Diamond Sparkle lippie in Sparkling Dusty Rose, 3 MAC lipsticks & a script brush I got for my gel liner from Michael's, which was only 96 cents. It has a yellow handle.

The white storage unit holds about half of my Everyday Minerals collection. The top drawer houses my foundation samples and a couple concealers on the side.

Second drawer houses extra eyeshadows. You can stack two layers of sample jars or one layer of mini sized jars.

The third drawer contains more eyeshadow. Coffee Break is a blush I use for eyeshadow and in the back are extra empty jars for future use. Now the Revlon Illuminance Creme Eyeshadow palettes you see here have been reused. What happened was that the heat spoiled my creme shadows so I cleaned it out and pressed some EDM eyeshadows in there using a nickel covered with a T-shirt. They came out pretty but matte powders hold up better than shimmery ones when using the alcohol method.

Fourth drawer holds most of my blushes. The ones I use most of the time I filled into sample sized jars and put them into my daily traincase. Then I tap those out into the empty Clinique compacts you saw earlier. It's better that way so you don't contaminate lids with your used brushes. I wash out the Clinique compacts when I'm done. Check out my video on that.

And the fifth drawer on the bottom holds pressed powders, finishing powders, a jar of custom mixed foundation, and what's my one MAC Paint Pot doing there? LOL. This is an EDM storage place only. Hehe. The MAC compacts hold depotted EDM pressed powders. Notice how I put these delicate items on the bottom? I'm a klutz and butterfingers and I tend to drop things. My pressed All Smiles blush is actually shattered. =(

I also have my makeup brushes on the tabletop as well as some random makeup that fit into little glass votive holders that look like shot glasses. I'll try to do pictures of all my other makeup in the future. Hope you enjoyed! =) What does your tabletop look like?

NYX Ultra Pearl Mania Loose Eyeshadows

(Click on image to enlarge)

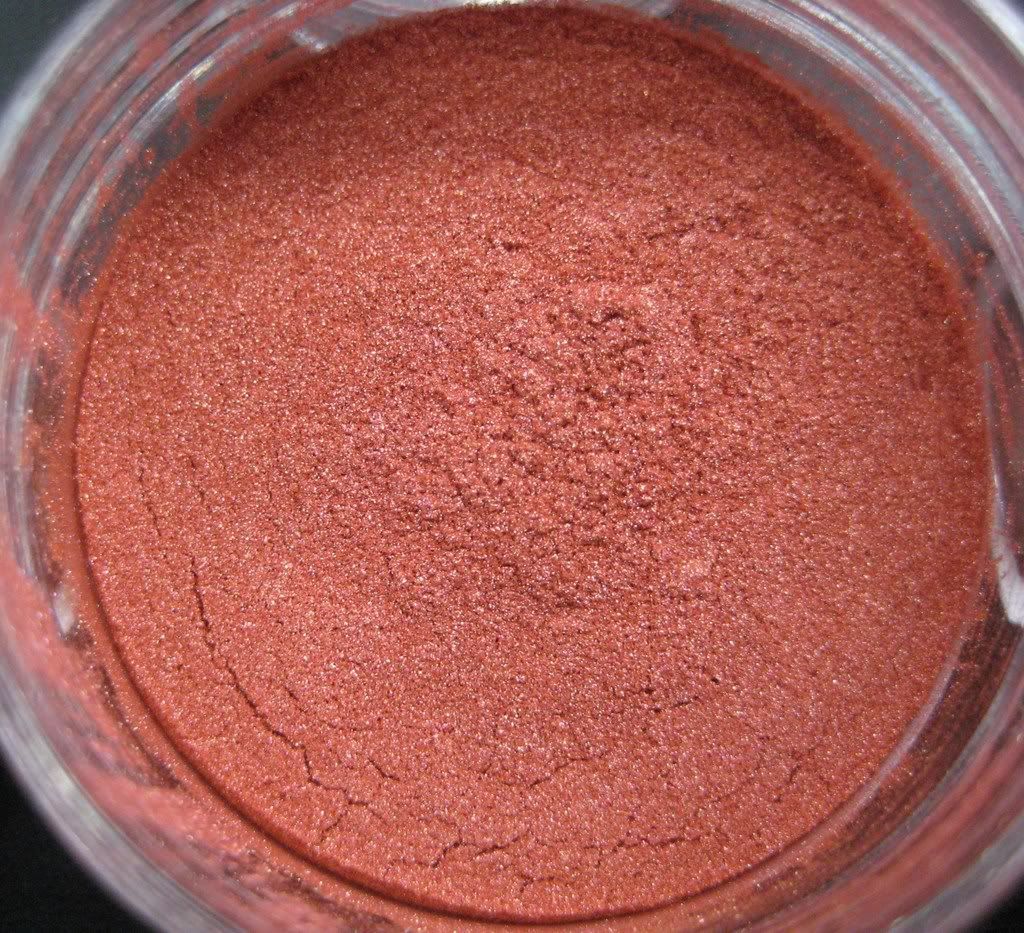
Cherry Culture had a sale not too long ago on their NYX pigments for $1.00 and they had offered free shipping too! Of course I couldn't pass that up. I got some more lipsticks too but that's another story. Hehe These are so cheap and the texture of these pigments are fine and not grainy. I didn't even use a base under the swatches and they're so pigmented. Of course, I got mostly neutral colors.


With Flash (click on image to enlarge)


Natural Light (click on image to enlarge)
*UPDATE* I added better swatches over a base.

I picked this up at Walmart for $6.97 and it's for bead storage. I like to mix my Everyday Minerals foundations also so these jars will come in handy.


Twenty-four jars

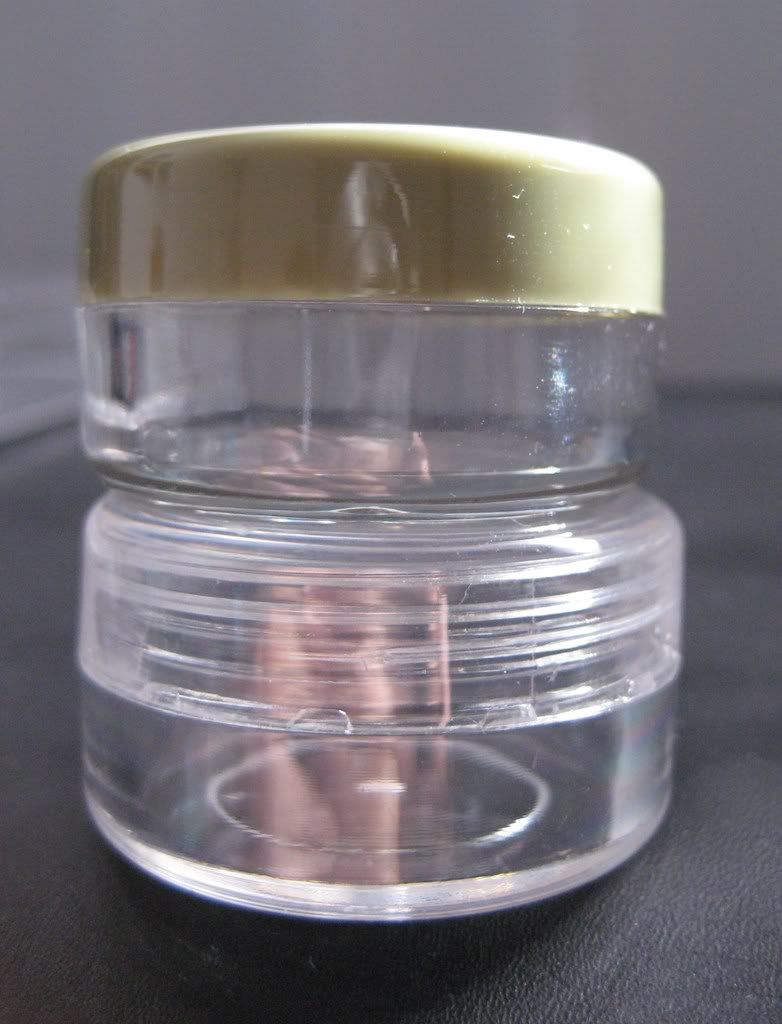
Comparison of the jar with an Everyday Minerals mini jar and a sample jar.

The jar from Walmart is ever so slightly wider and taller than the 10ml mini jar from EDM. They have no sifters.

Make sure you wash these out with soap and water before putting anything in them. Even though the kit was sealed, you want to be as sanitary as possible.

Here's the finished product. I emptied just half of those 5ml NYX pigments in the jars and they filled them about half way. It looks like there's just a small amount of pigments in the bottles but there's a huge amount. I didn't feel it was necessary to empty the bottle completely since there's so much in the jars already.

Fanta is my favorite. Isn't it gorgeous?! It's a pretty melon color.

Depotted MAC Eyeshadows....What To Do With 'Em


So what do you do with your depotted MAC eyeshadows that you supposedly can't Back-to-MAC anymore without the pans in them? Use them for your headache medicine of course! LOL. These 400 mg Ibuprofens are my saviors. (I guess you can put coins in them also.)
MAC now stands for Migraine Alleviating Caplets. LOL!

The Easiest Depot Ever!...In a Magnetic CD Palette

See my pretty CD palette? YAYE! It's actually the second one I've made because the first one was for some depotted Ulta eyeshadows which I need to make a post on. But I depotted 6 of my 8 Revlon Colorstay quads and they were the easiest things I've ever depotted...easier than Milani singles or Ulta Singles!


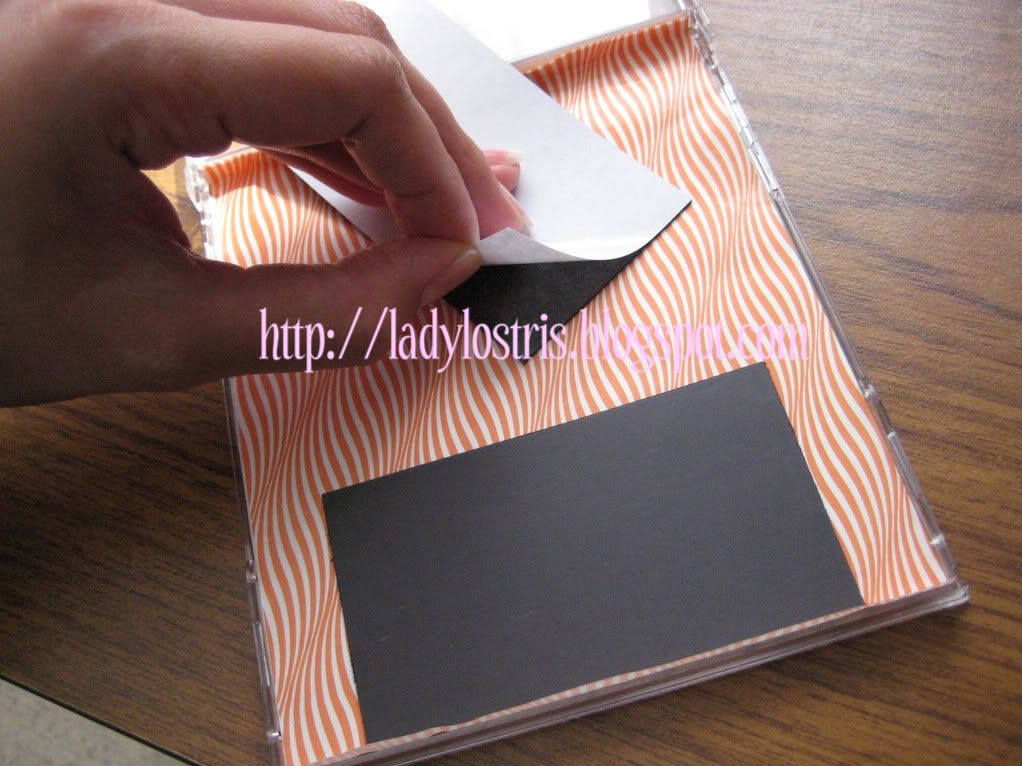
So in the picture above the names of the quads starting from the top left corner going clockwise are: Sultry Smoke, Steel Impressions, Spring Moss, Blushed Wines, Lavender Meadow & Priceless Metals. And yes, it's magnetic. I used my peel and stick business card sized magnets that I got in a pack of ten at Joann craft store. I used three but had to trim off one of them to fit the inside of the case perfectly. If you want a straight line, especially when trimming the origami paper, use one of those cutters with a slide blade that's used for photos and other crafts. You can see the excess magnet on the left side of the palette. It's that gray strip.


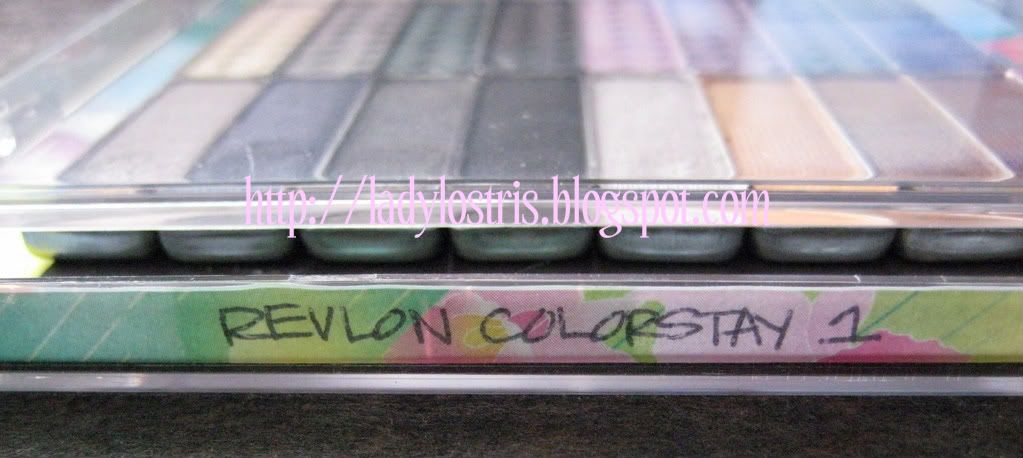
I brought the edges of the origami paper up both sides so that it has nice decorative edges and on the spine I wrote the name of my palette. I decided to call it "Revlon Colorstay 1" in case I want to depot my other quads, plus I always get more anyway.

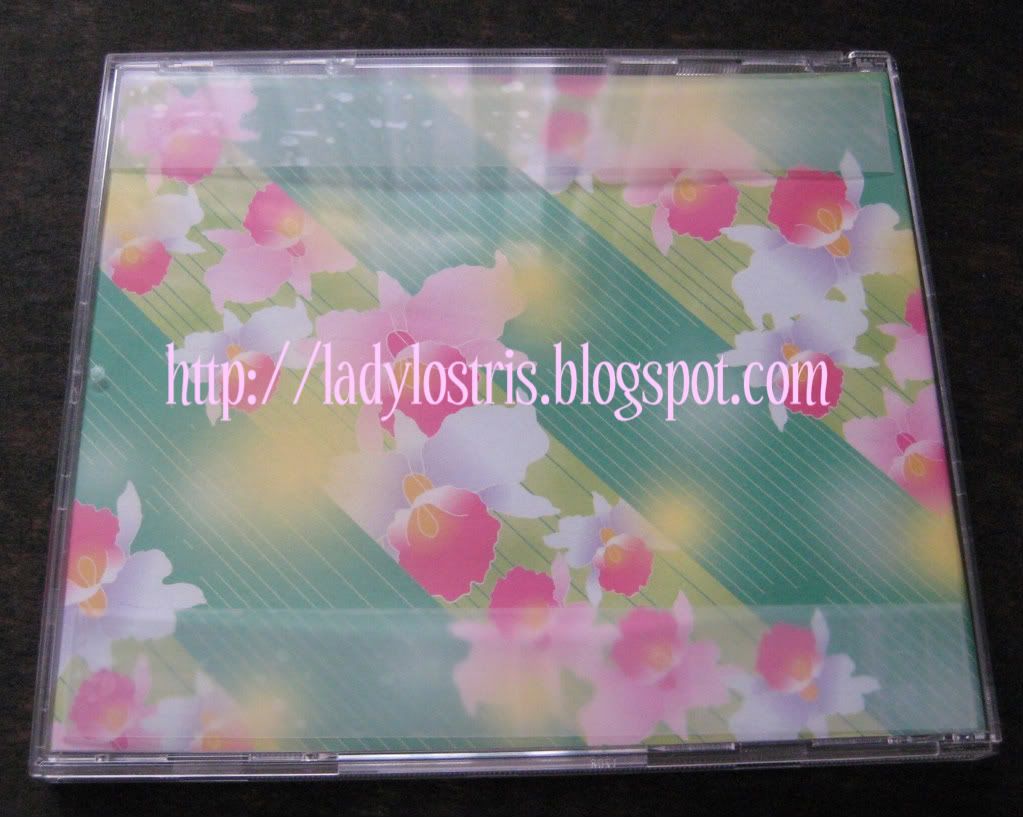
Here's the back view. As you can see, I used two different designs of origami paper for the back and for the inside bottom. I decided not to make a front label so that I can see what's in there. I like it that way better. You can also write the names of the eyeshadows on top of the CD case cover with a Sharpie if you wanted to. I just used Scotch Tape to adhere the paper to the CD case and I made sure to use two big strips on the top and bottom since I knew this palette would be heavy. Yup, it's pretty hefty with 24 pans in them. I recommend DOUBLE-SIDED Scotch tape for the best hold and appearance.

I used business sized peel and stick magnets. You need 3 of them but you'll have to trim one of them down a little. (This is a pic of the other palette I made)


And if you decide you want to take some with you for travel, 7 pans will fit perfectly into a depotted NYX trio case. All you have to do is peel and stick another magnetic sheet to the bottom of that and voila, you are ready to go.

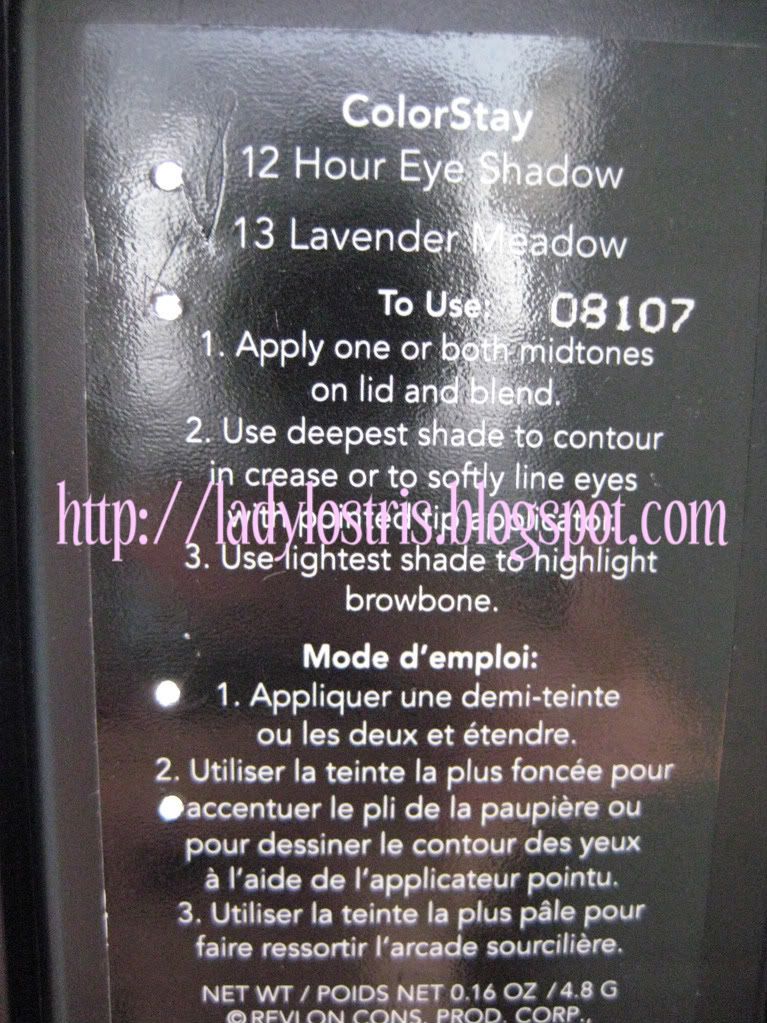
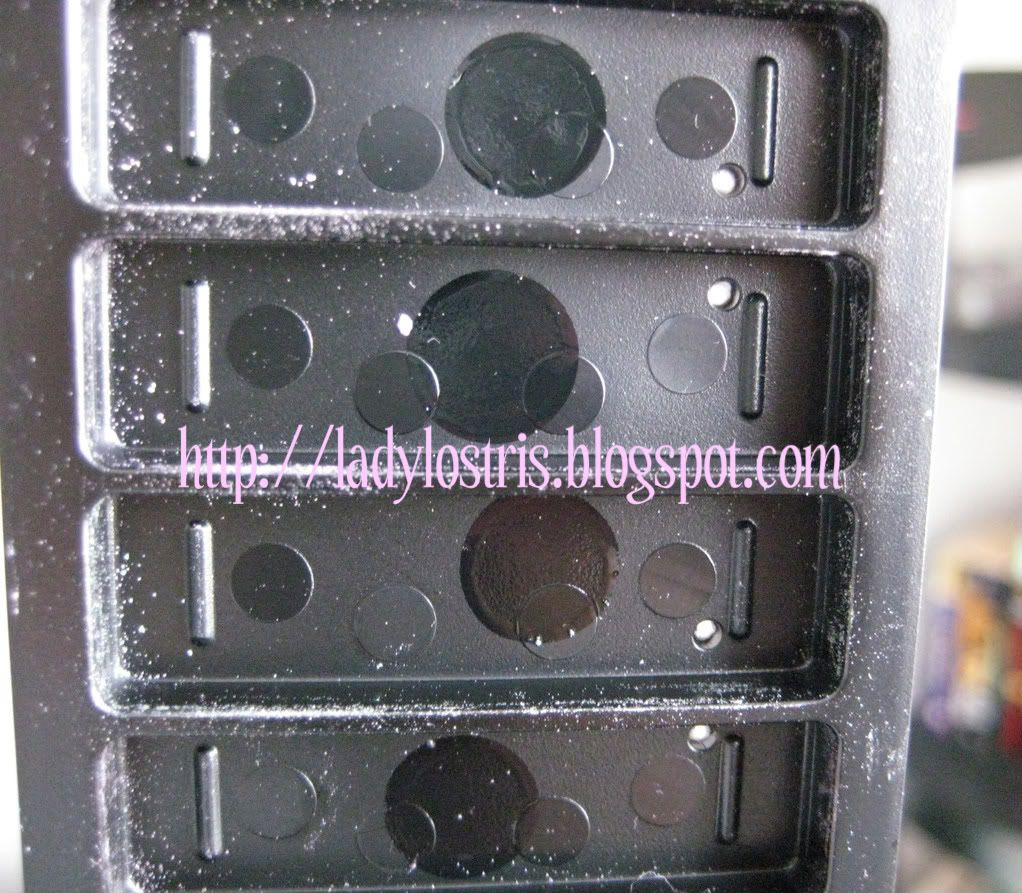
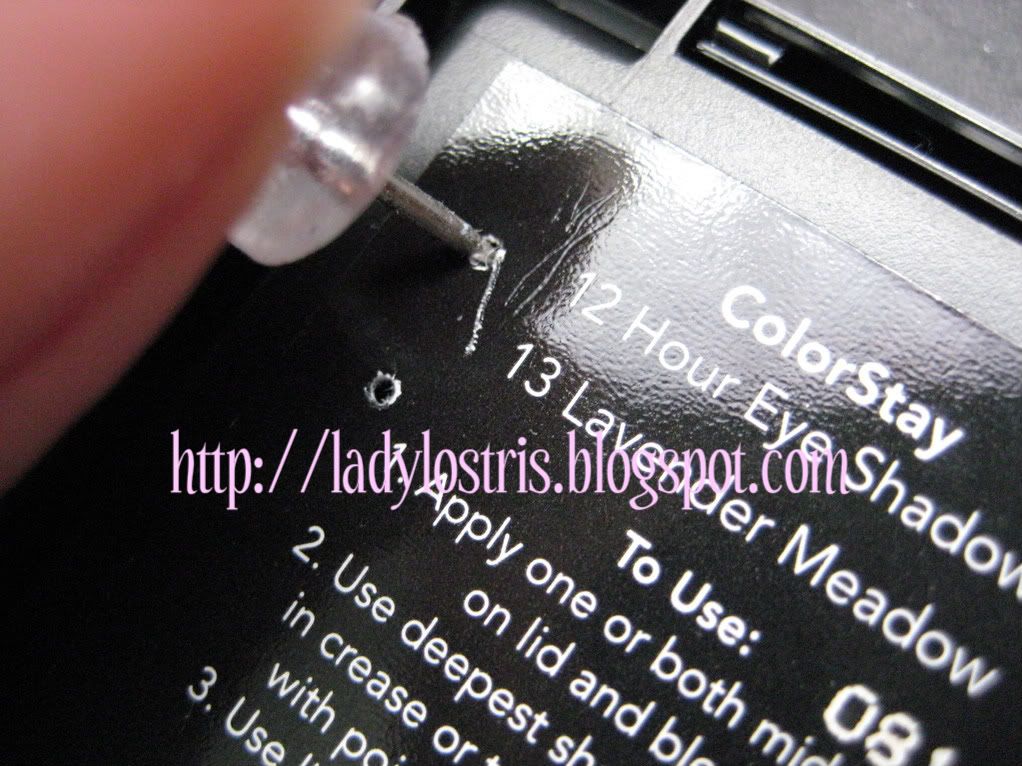
This is how I depotted them. All you need is a push pin and nothing else. If you turn it on it's back, there are 4 holes on the left side of each quad. The first two quads I did, I peeled off the stickers and then I realized I didn't need to do that! I just had to find the first hole on top and poke through the sticker. Once you find the first one, then the others are easier to find since they're lined up in a straight line.

Here's the front view of a depotted quad. See the four little holes on the right side?


Here's the push pin I used. You can also try using the back of an earring.

The g00iest, stickiest, creamiest, most annoying glue ever!


Sorry I don't have a pic with the shadows being pushed up the palette (UPDATE: I added a pic). Once I got started, I just did all of them. LOL. But behind each shadow pan is a circle of glue near the middle of the pan. It's a different kind of glue where you don't have to melt or dissolve with alcohol. It's really sticky, creamy, and gooey...kind of like the consistency of peanut butter and if you get it on your hands it's a mess. I used a paper towel to scrape it off the back of each pan. I found that alcohol didn't really help in removing the excess from that back and it just left a tacky mess. And you need only to apply little pressure with the push pin since the pans lift up so easily.


I swear these Revlon Colorstay Quads are the easiest things in the world to depot. It's like Revlon knew we would like the option of depotting since they put those four little holes in the plastic. Now why can't every company do that? Hmm, maybe they do! I'm going to start peeling off the backs of my drugstore eyeshadows to check. LoL =P

If you make this palette, this would be the optimum hold for eyeshadow or blush pans WITHOUT magnets because some magnets do not stick very well to these magnetic sheets. If you want to make one for eyeshadow with magnets on the bottom of them already, try using a metal sheet to glue on the bottom of the CD case like the kind you find at the bottom of an e.l.f. compact.

Have fun depotting your Revlon Colorstay Quads and making you own CD palette!! <3>


*UPDATED PICS*

I made two magnetic CD palettes! Yaye! My pride & joy.

Quad names clockwise from top left: Blushed Wines, Berry Bloom, Lavender Meadow, Sultry Smoke, Steel Impressions (@ Walmart only) & Spring Moss

Quad names clockwise from top left: Priceless Metals, Copper Spice, Coffee Bean (matte except for the 3rd color), Sterling Rose, Nude Elements, Sandstorm
Swatches to come!...
See swatches here.

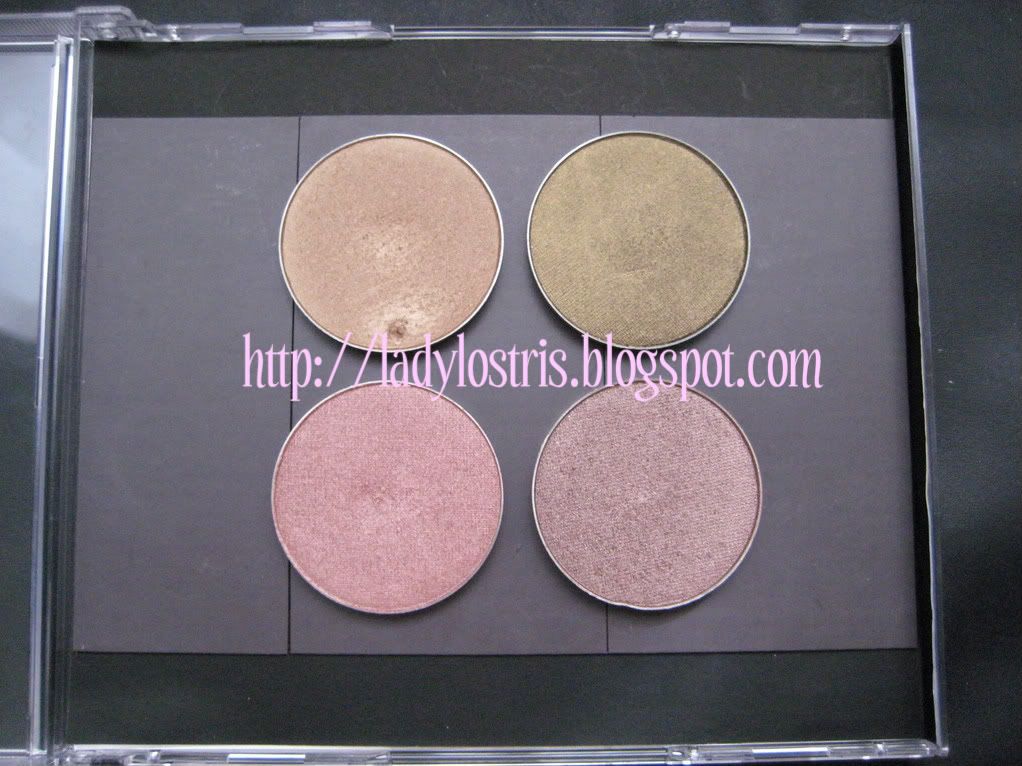
I made a palette for my first four Ulta eyeshadows which are such good quality! They're huge too. You get about 3.6g or something and they're really creamy and pigmented. I got these on a BOGO. They used to be $6.50 each but now they're $7.00. What's up with that? But it's still worth it. This was the first CD palette I made. You can fit up to 9 Ulta eyeshadows in this baby.

Clockwise from top left: Cashmere, Golden Olive, Plum Smoke & Rose Dusk
 
Lady Lostris Beauty | TNB